
How to Start an Online Store using WooCommerce (A Complete Guide)
Starting an eCommerce business online is an achievable goal that requires determination. WordPress, a popular CMS, can easily assist and guide you through the process.
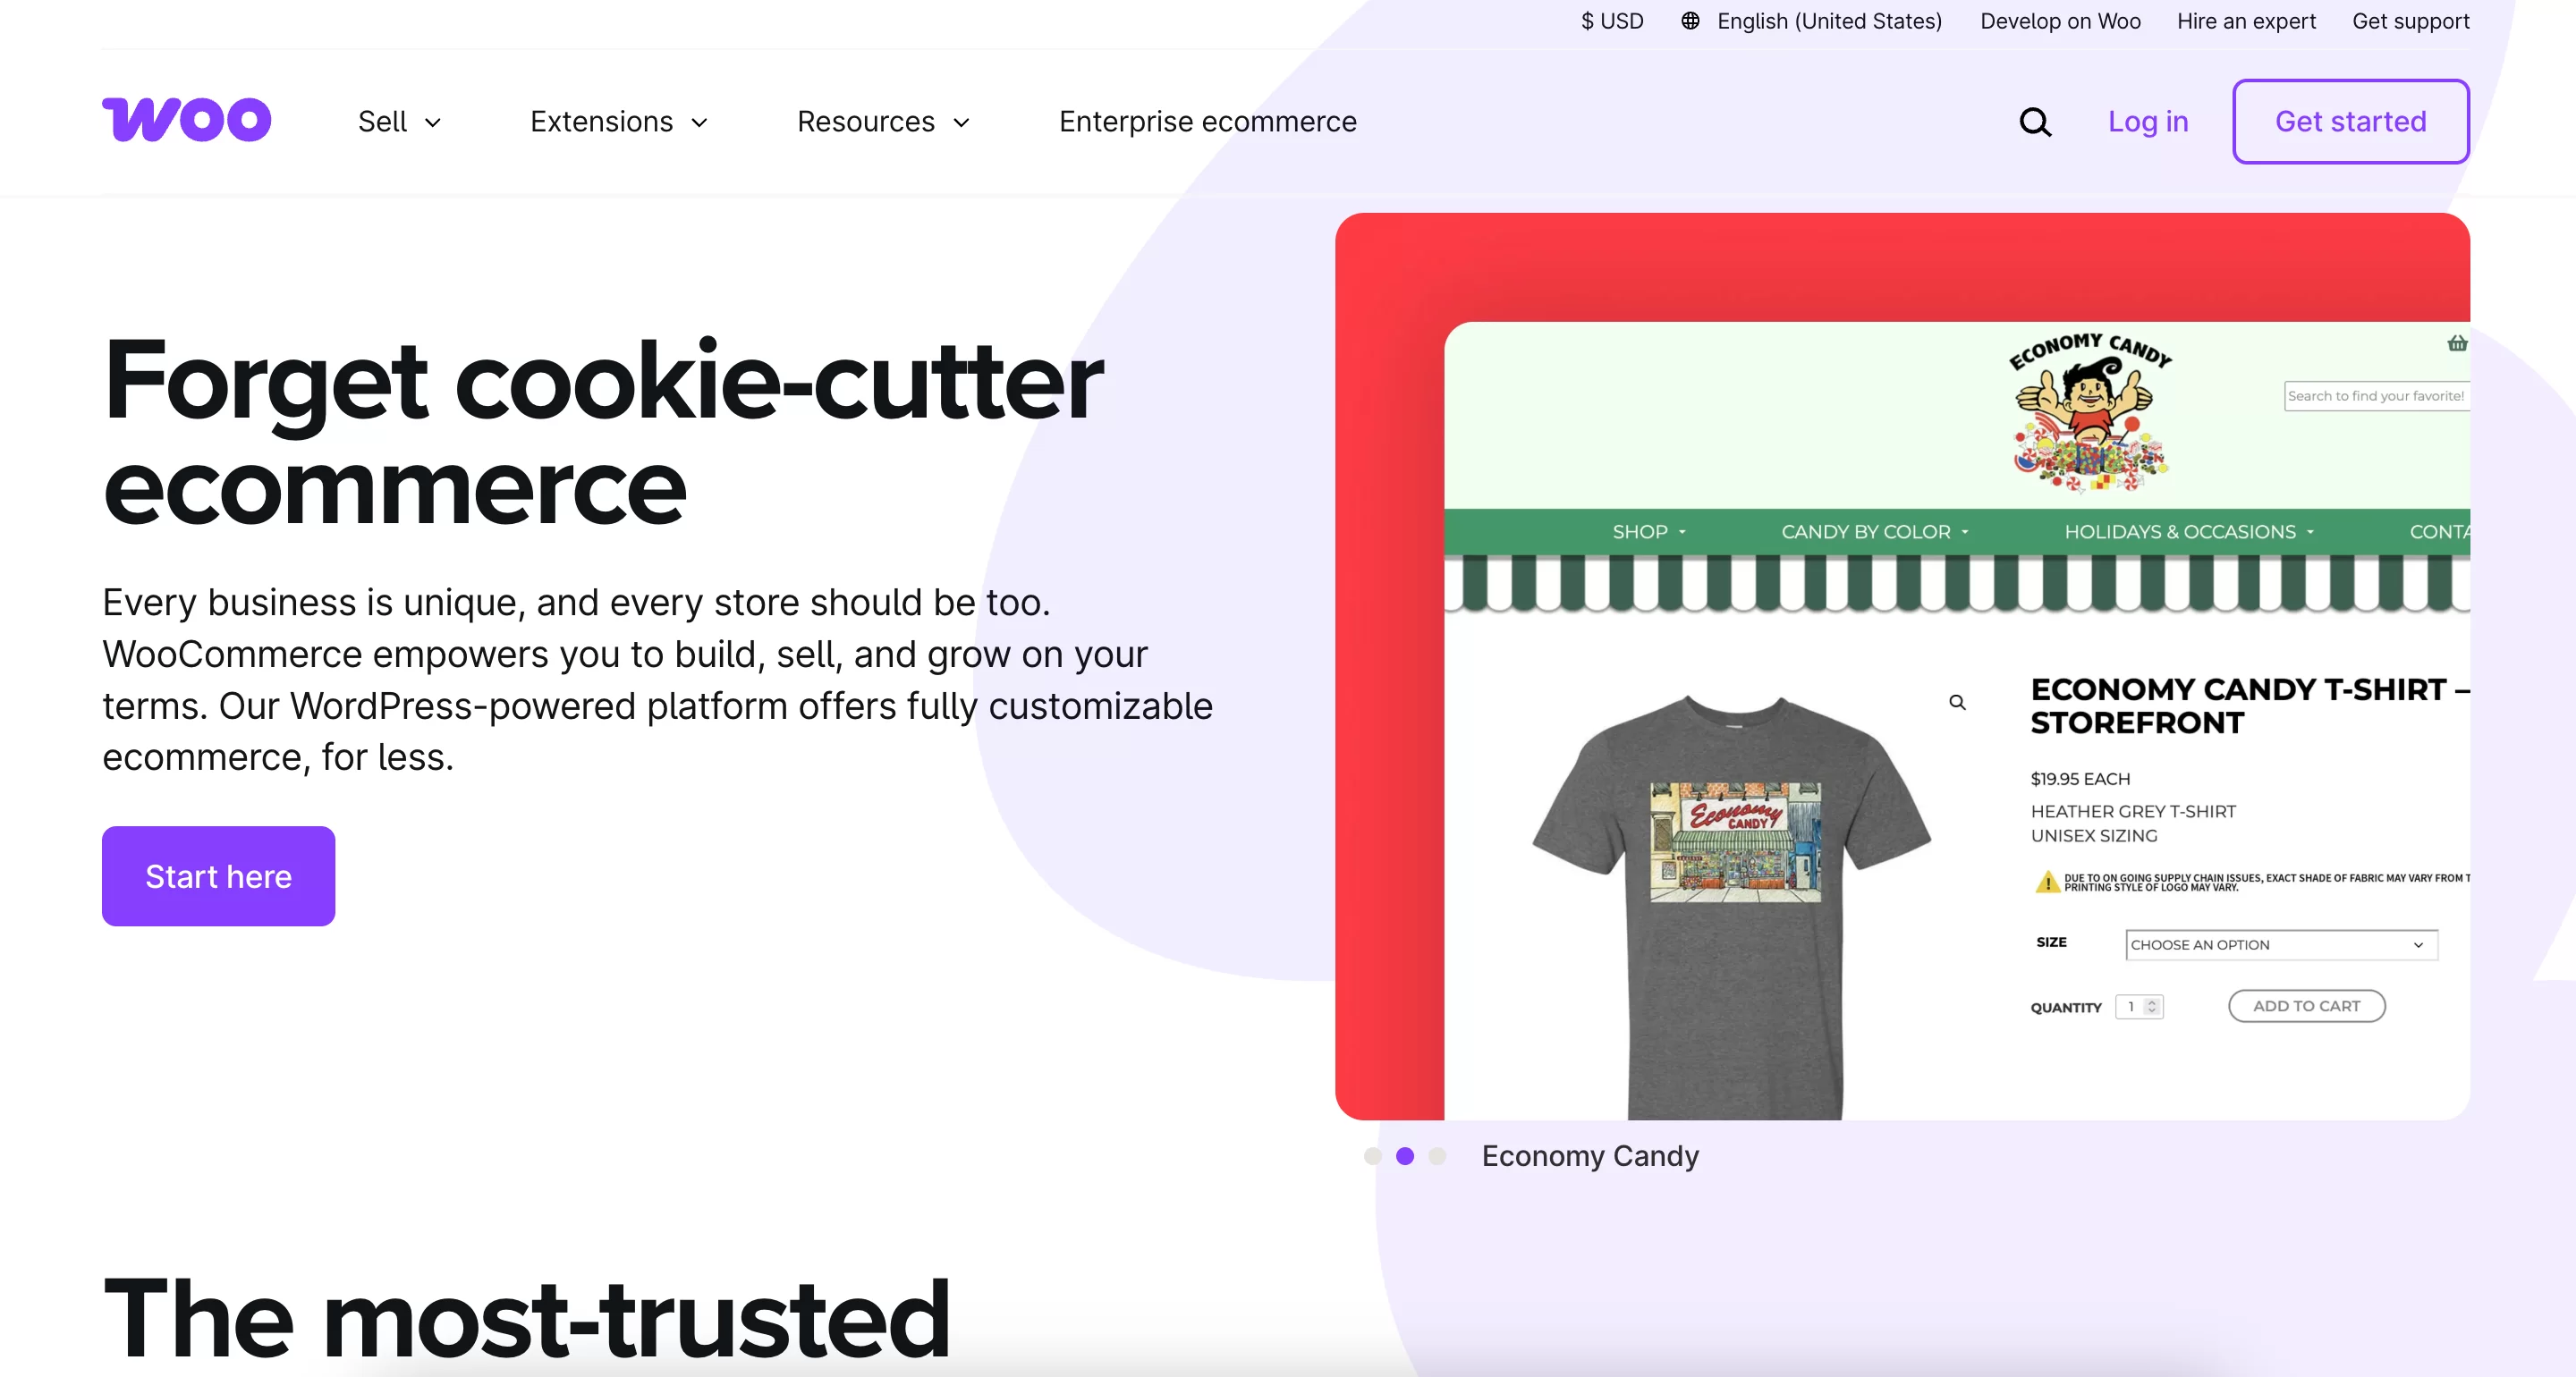
WooCommerce is a well-known eCommerce solution for WordPress that offers a wide range of plugins, themes, and functions to help you create a store and design your website.
Even if you lack technical skills, WooCommerce has all the necessary features and functions to make your eCommerce business a success.
However, I dive deep into the topic; let’s learn a bit more about WooCommerce, its benefits, and other facts.
Let’s get started:
- A Checklist Before You Build a WooCommerce Store
- How to Create an Online Store with WooCommerce
- Step one: Choose a catchy business name
- Step two: Choose your hosting provider
- Step three: WordPress and WooCommerce setup
- Step four: Customize your store
- Step five: Add products
- Step six: Add payment method
- Step seven: Set up taxes
- Step eight: Add shipping method
- Step nine: Security measures for your online store
- Additional step: Post-launch marketing plan
- Conclusion
What is WooCommerce – A Long Story Short
WooCommerce is a plugin that can turn your WordPress website into a full-fledged online store. It is known for its ease of use, customization, and amazing features.
Whether you’re a small business or a large enterprise, WooCommerce offers a customizable platform to showcase your products, manage inventory, process payments, and handle shipping—all within WordPress’s dashboard.
In short, it’s a compact tool for newbies to create an online store from scratch.
What’s more? Let’s find out below:
- Easy to set up and use: If you’re already familiar with WordPress, adding WooCommerce requires a minute. There are also many resources available to help you get started.
- Customizable: You can design your store to match your brand and give your customers a great shopping experience.
- Scalable: WooCommerce can grow with your business, whether you’re just starting out or you’re a large enterprise. Many extensions are available to add additional features and functionality to your store.
Why Choose WooCommerce
According to BuiltWith, WooCommerce powers over 9.5% of all websites with online stores globally. This signifies its significant presence in the eCommerce field.
Apart from the discussed benefits, there are several compelling reasons to choose WooCommerce for your online store, especially when compared to other eCommerce platforms.
Let’s talk about them one by one.
1. Cost-effective and affordable
WooCommerce itself is free to download and install. This makes it a particularly attractive option for startups or businesses on a budget. You only pay for web hosting, domain name, and any extensions you choose to add.
2. 100% compatible with other themes
WooCommerce integrates seamlessly with WordPress, giving you access to a massive selection of themes designed specifically for eCommerce. This allows you to create a visually appealing and user-friendly online store that reflects your brand identity.
3. Easy to customize, edit and manage
The entire dashboard, interface, and options are easy to understand. You can easily add products, and categories, manage inventories, set up payment gateways, and more. Also, there’s an active WooCommerce online community where you can find resources, tutorials, and guidelines to get started.
4. Useful for both SMEs and large enterprises
WooCommerce can cater to businesses of all sizes. Whether you’re a small startup with a handful of products or a large enterprise with a complex product catalog, WooCommerce can handle it. The extensive library of extensions allows you to add new features and functionalities to your store as your business grows.
5. Super cool features and functionalities
With WooCommerce’s user-friendly features, including product addition, inventory management, and shipping customization, creating an online store is easier than ever. For newbies, it is easy to manage their shop.
6. Best for SEO and marketing perspectives
WooCommerce is built on WordPress, a platform known for its SEO friendliness. This can help your online store rank higher in search engine results pages, driving more organic traffic, which in turn means more sales.
7. Technical documentation for a quick help
As WooCommerce is an eCommerce tool, it is important to know how to enable it on your website. To do so, you need a technical guide or documentation. Thankfully, WooCommerce provides a comprehensive knowledge base for its users.
This includes information on how to enable the setup wizard, as well as guidance on customizing product pages. These technical resources are designed to help even those who are not technically savvy.
Overall, WooCommerce is a versatile e-commerce platform with scalability and customization options for businesses of all sizes. It is cost-effective and provides a powerful solution for building and managing online stores.
A Checklist Before You Build a WooCommerce Store
It’s important to plan to build a successful WooCommerce store. This all-inclusive checklist will help you navigate the crucial steps to guarantee a successful launch and a great customer experience.
Before getting started with the technical aspects of setting up your store, consider the following points:
1. Target setup
First, you need to set your target. A business always requires a definite target, so you can work based on it, following a proper strategy, plan, and timeline.
To get help, you can ask yourself some questions.
- What are your expectations and USP (Unique selling point)?
- Why is your store different from other stores?
- Who is your target audience?
2. Niche selection
Next, you need to select your niche. It depends on different things. After you have researched your market and audience, niche selection is crucial. Choose a different niche, useful, has market demand, and is unique.
3. Technical part
Install the latest version of WordPress and then the WooCommerce plugin. Check the functionalities, compatibilities, and other details to ensure that everything is ready to get started.
4. Website design essentials
Have some plans in your mind for your store design. Do an R&D on your website’s Outlook. Check the available themes on WordPress. Then, customize it to make the theme unique by following all the UI-UX standard theories.
5. Product description and images
Try to upload clear-quality photos of your products. Also, describe your products so users can easily learn about them. There may be some variations in size and color according to the price.
6. Knowledge base and guidelines
For better understanding, provide a knowledge base where required and publish quality blog posts for getting SEO benefits.
7. Payment gateways and security measures
Integrate secure payment gateways like PayPal, Stripe, or Authorize.net to allow customers to make online purchases. Define shipping zones and taxes, and take security measures for your online store. Install SSL to encrypt users’ data and transaction histories.
8. Final test and check the responsiveness
Once everything is done, conduct thorough testing, either with the help of your QA team or by yourself. Consider responsiveness and other aspects, such as the shopping cart, checkout process, and payment settings.
So these are the most common checklists that you should focus on before launching your first online store with WooCommerce. Also, have a team that always looks for improvement. It’s a never-ending process as you’re not doing business for one time.
How to Create an Online Store with WooCommerce
Now you have a solid understanding of WooCommerce, how it works, and its features and functions.
Let’s see how to create a fully functional online store with WooCommerce. We’ll try our best to provide an easy step so that you can easily achieve what you’re expecting.
Just follow the steps.
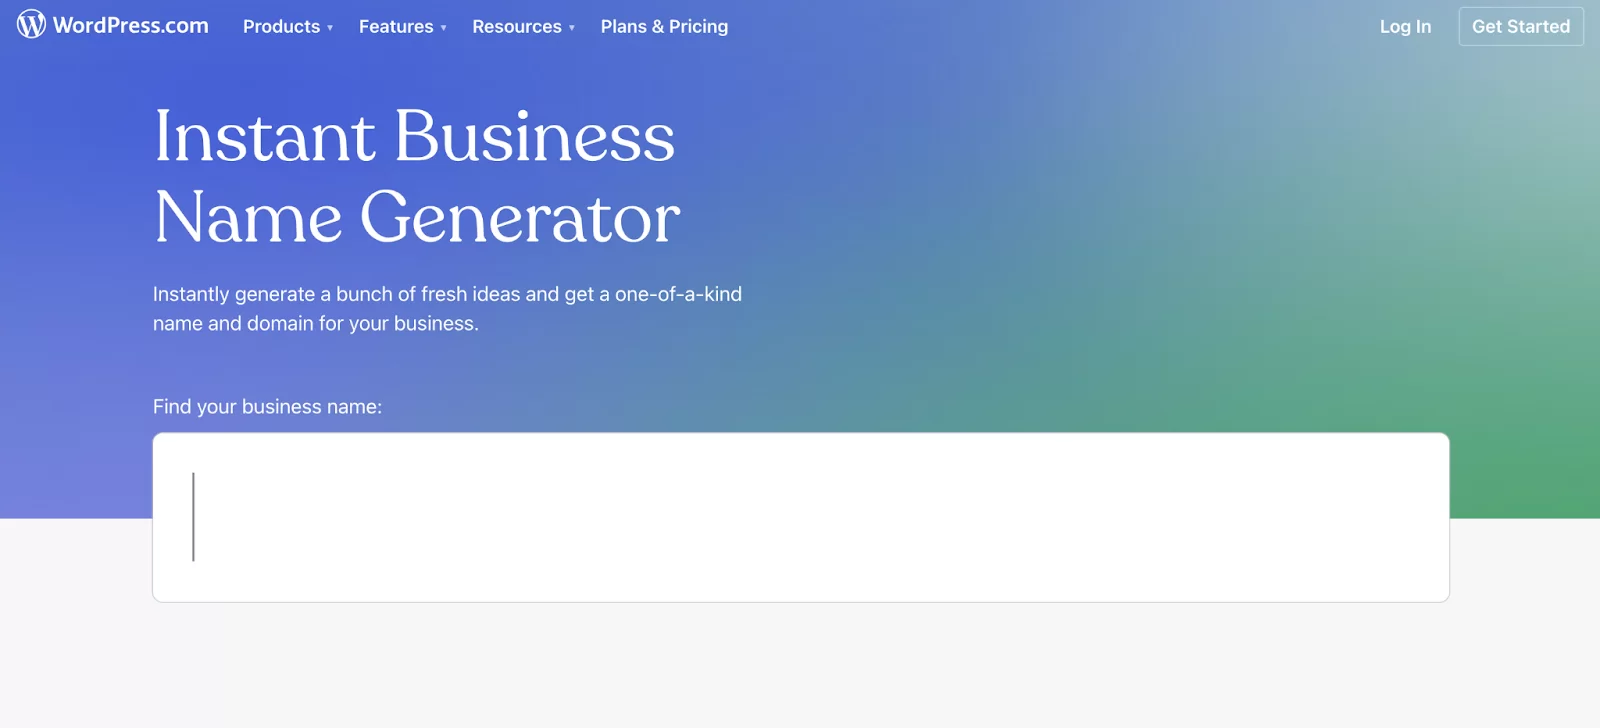
Step one: Choose a catchy business name
Your business name is the first impression that users will get to know. If it seems relevant, then it will create an impact on users. Initially, you may struggle with the name selection. But WordPress has a tool to assist you. WordPress name generator. Search for it and follow the process.
Step two: Choose your hosting provider
It’s important. You must know the basics of how a hosting provider works. It will capture all your database information and crucial information in its hosting panel.
There are different types of hosting: personal or self-hosting, shared, cloud, and private. Prices vary depending on your business, needs, and budget. However, WooCommerce has its own hosting service called WooCommerce Express. You can have a look here.
Other popular hosting providers, such as BlueHost, Siteground, and Kinsta, are also available. You can check them out.
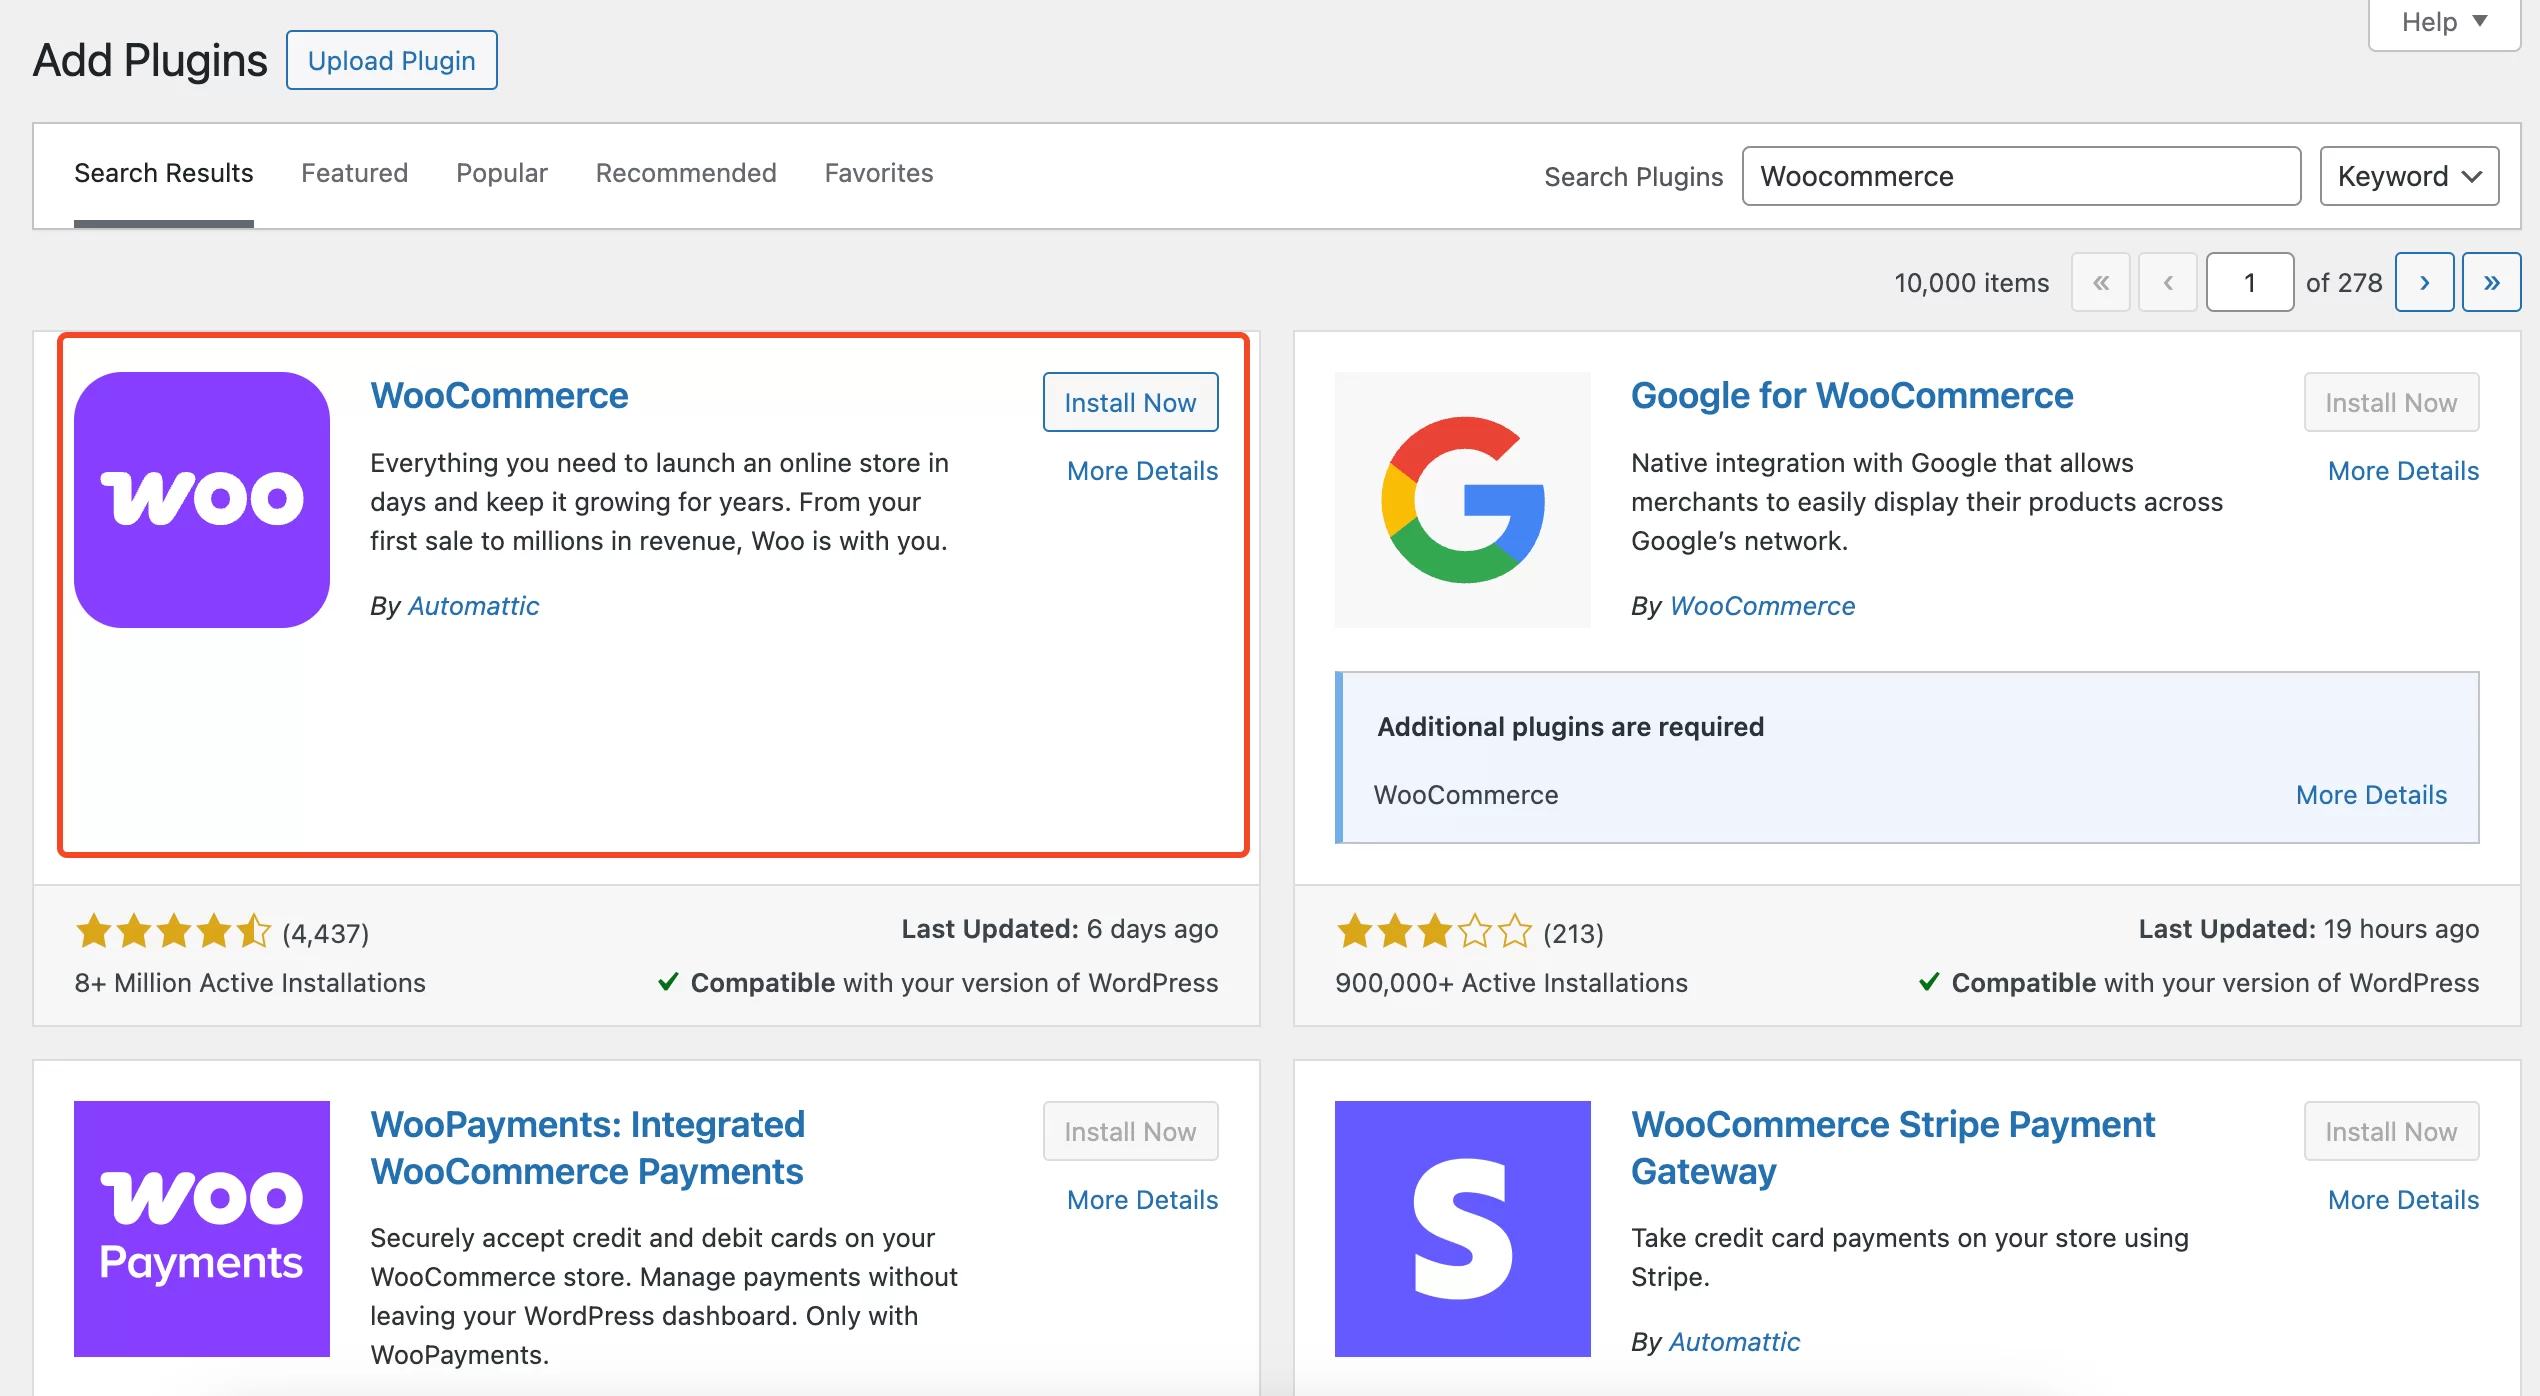
Step three: WordPress and WooCommerce setup
Installing WordPress is super easy. After you have selected your domain name and hosting, you’ll have a domain address. Just install WordPress on your preferred hosting provider. Here is how you can install WordPress on your local server or live server.
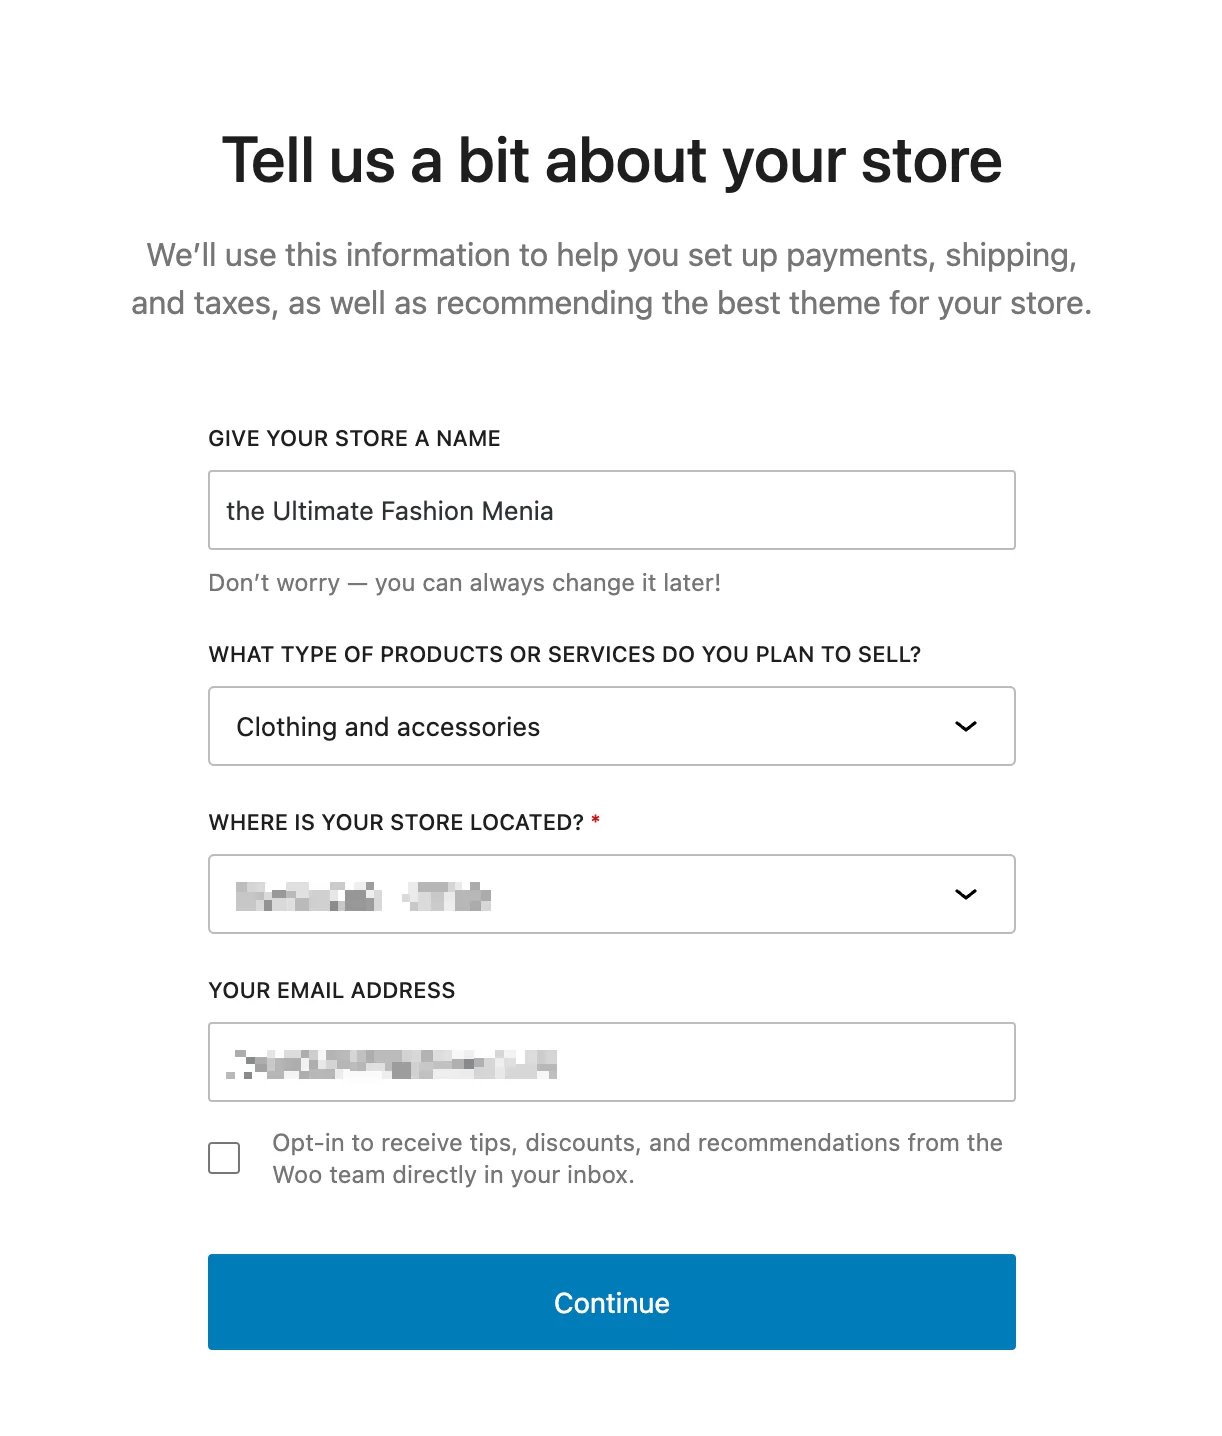
Once you have installed WordPress, the next step is to install WooCommerce. Open the add plugin page and install WooCommerce from there. Then you’ll get a setup wizard to complete.
It will land you on your Store Setup Checklist. It will ask for some information about your products, payments, taxes, shipping, and marketing-related tools. It will help to customize your store.
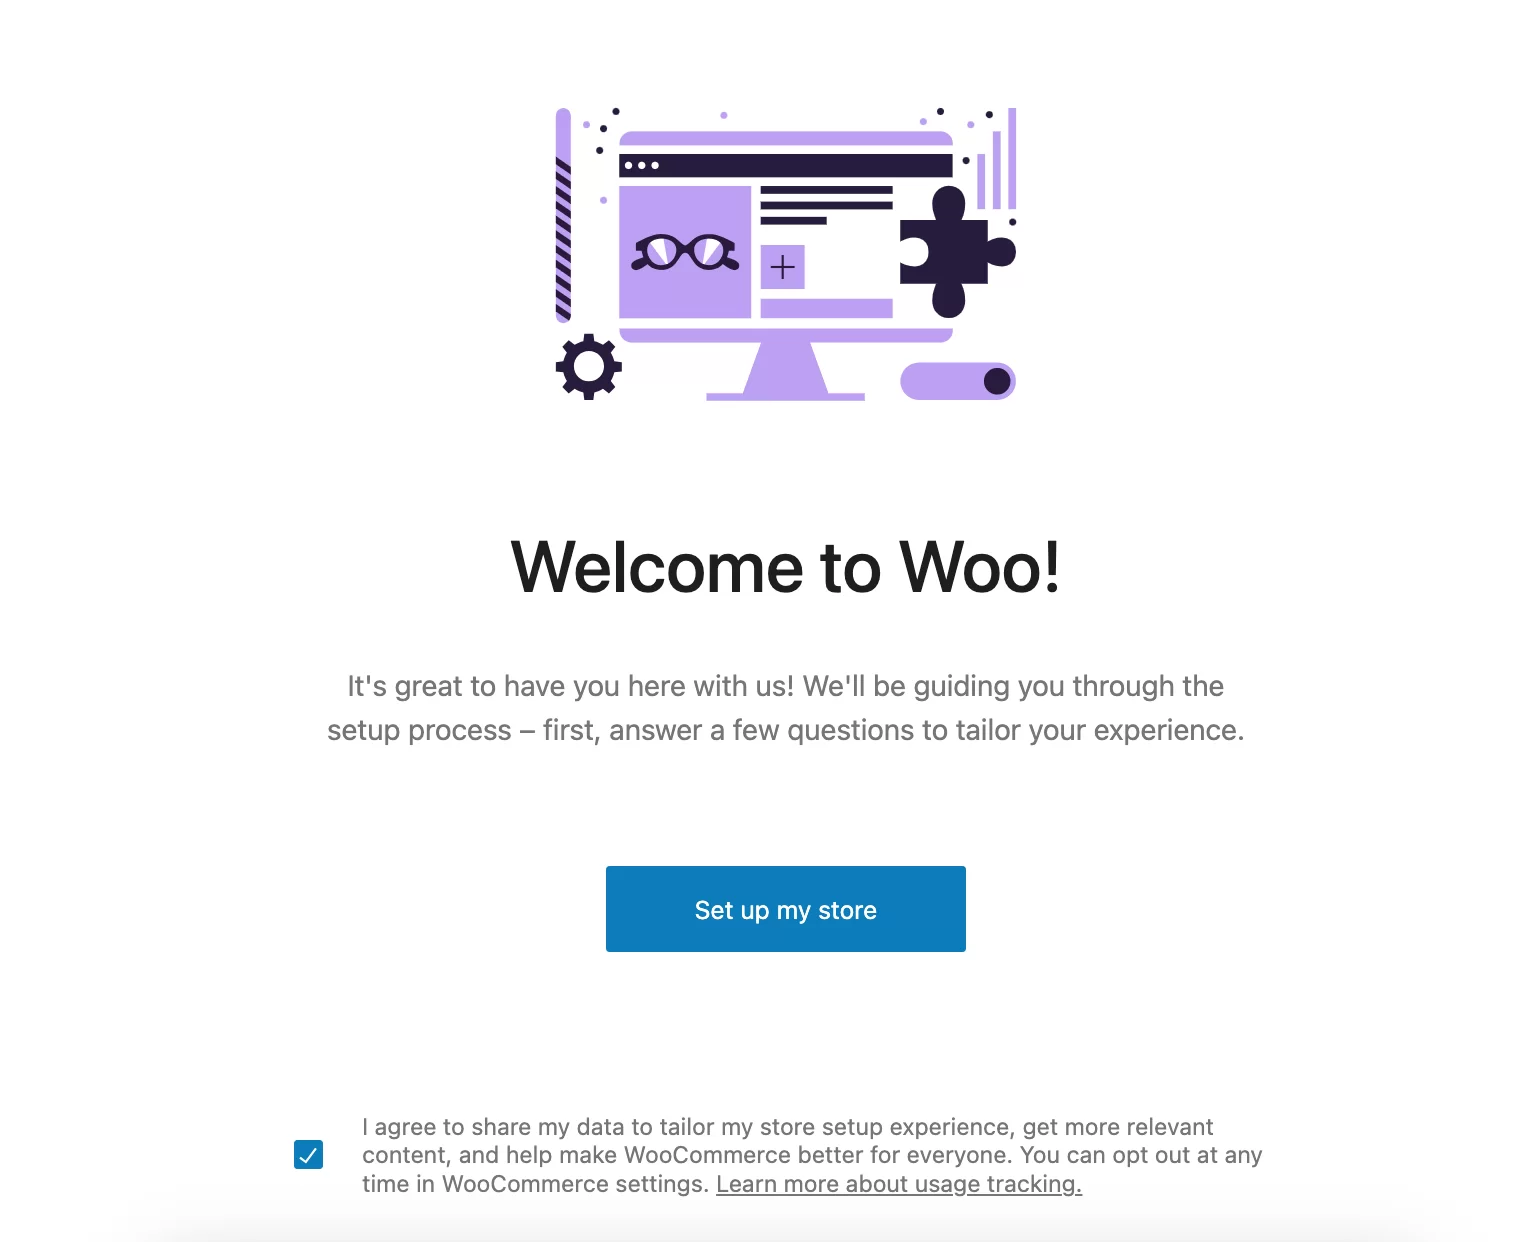
Just follow the setup wizard and enable the options that you need.
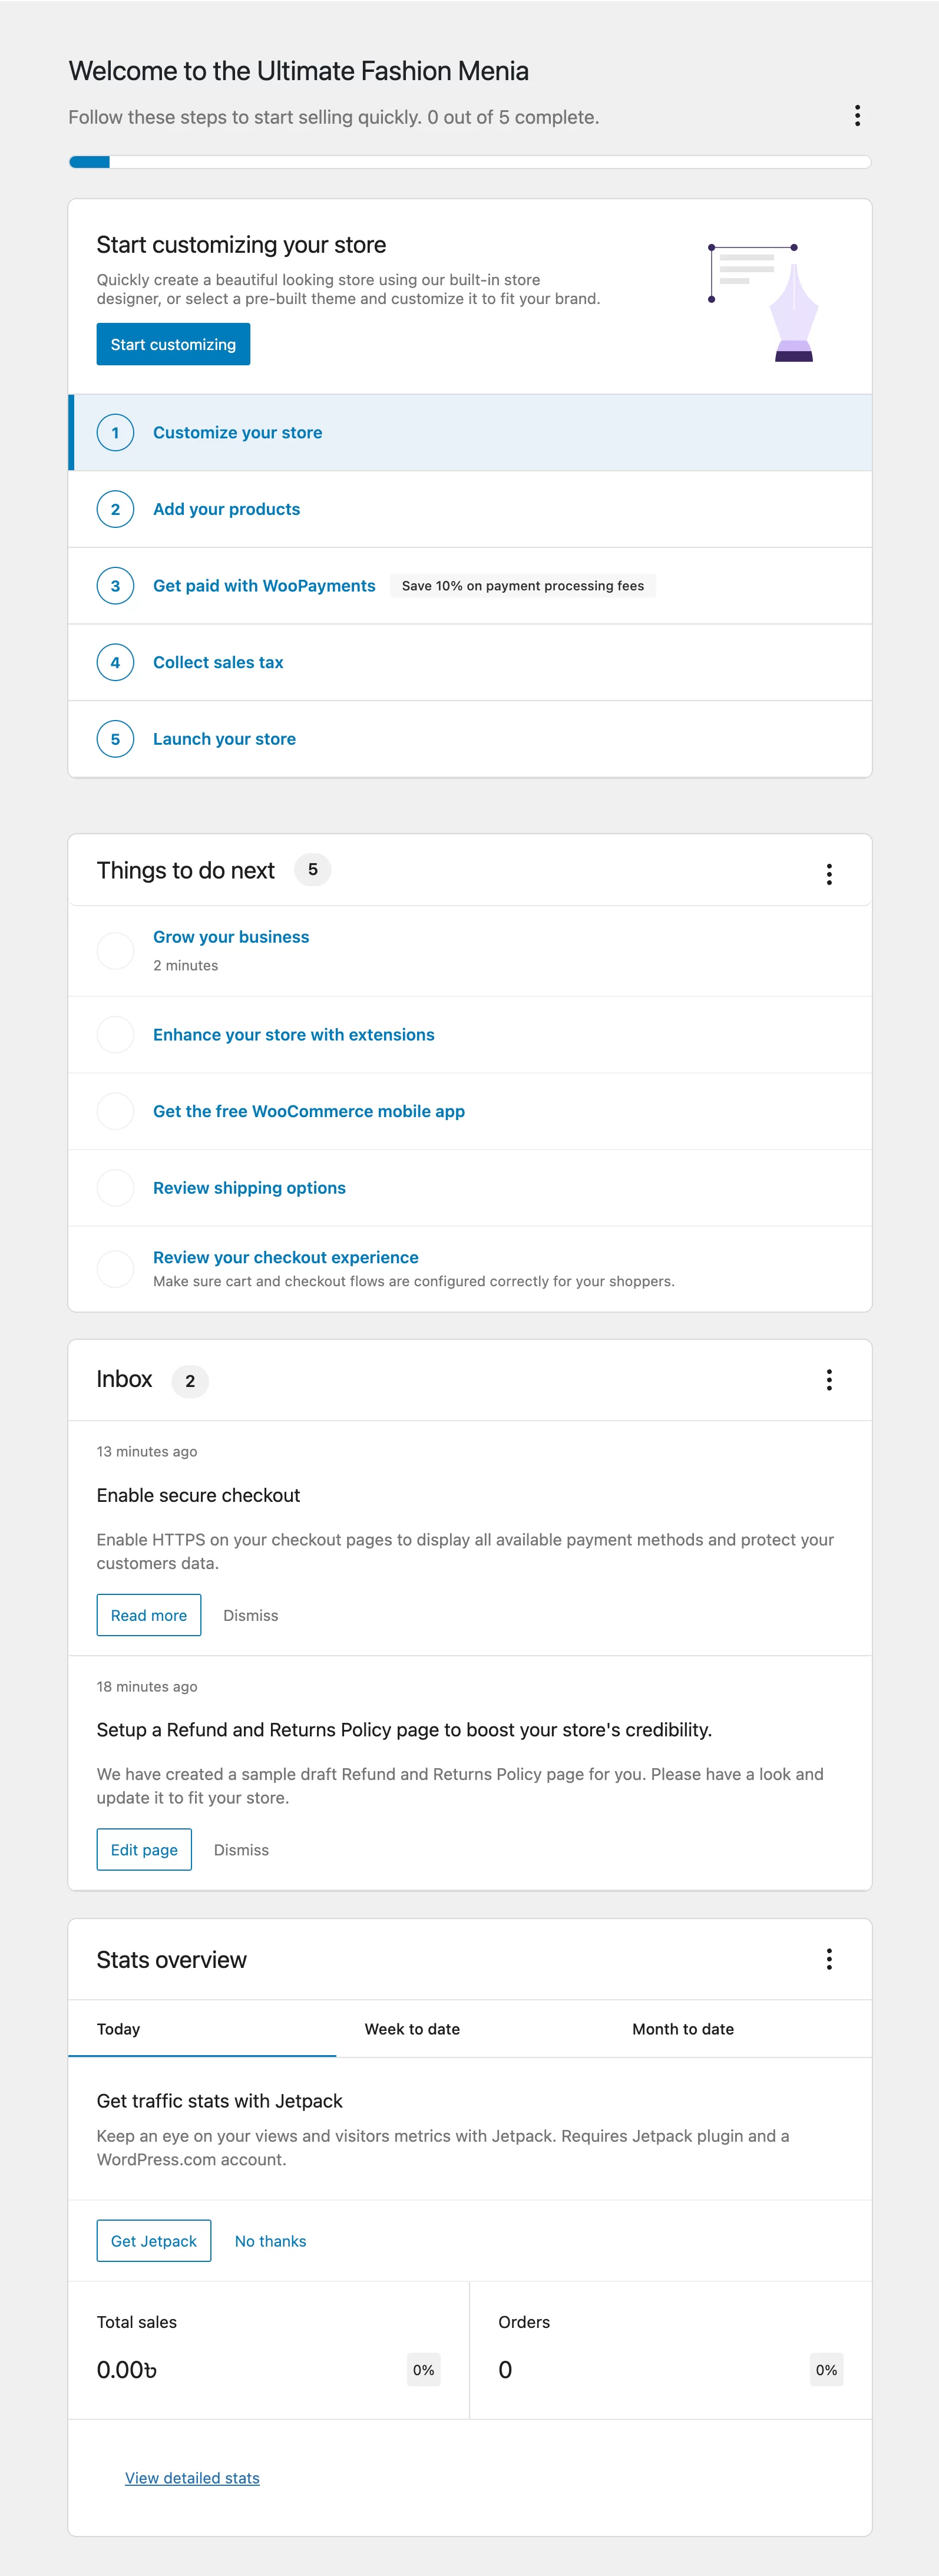
After completing the process, you’ll land on the backend dashboard. Here you’ll see some recommended steps that are beneficial for your store.
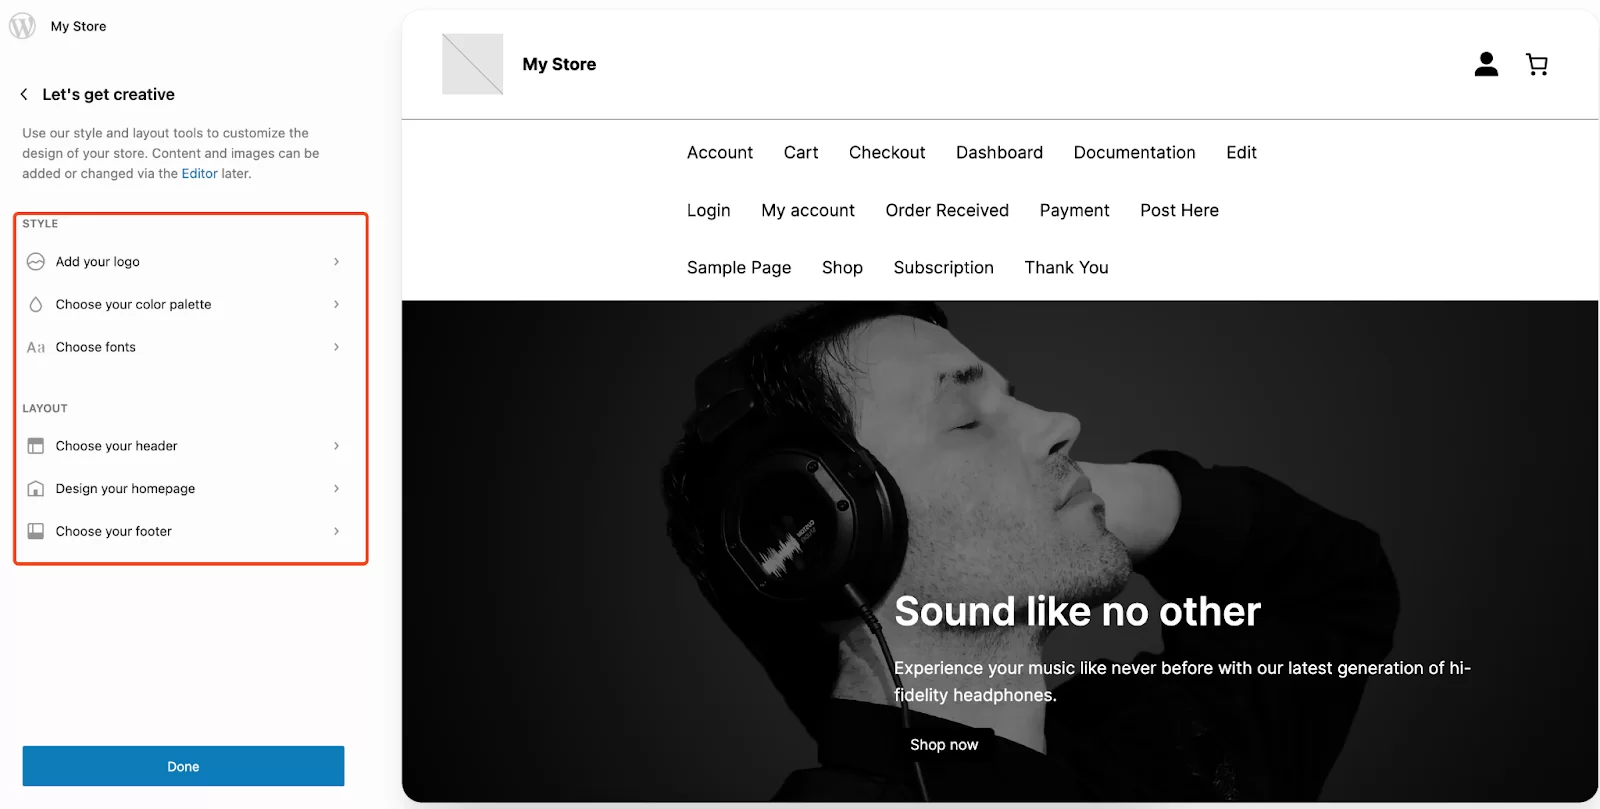
Step four: Customize your store
You’ll see this step after you click on the Customize your store button. Here all the default themes are available. You can design it yourself.
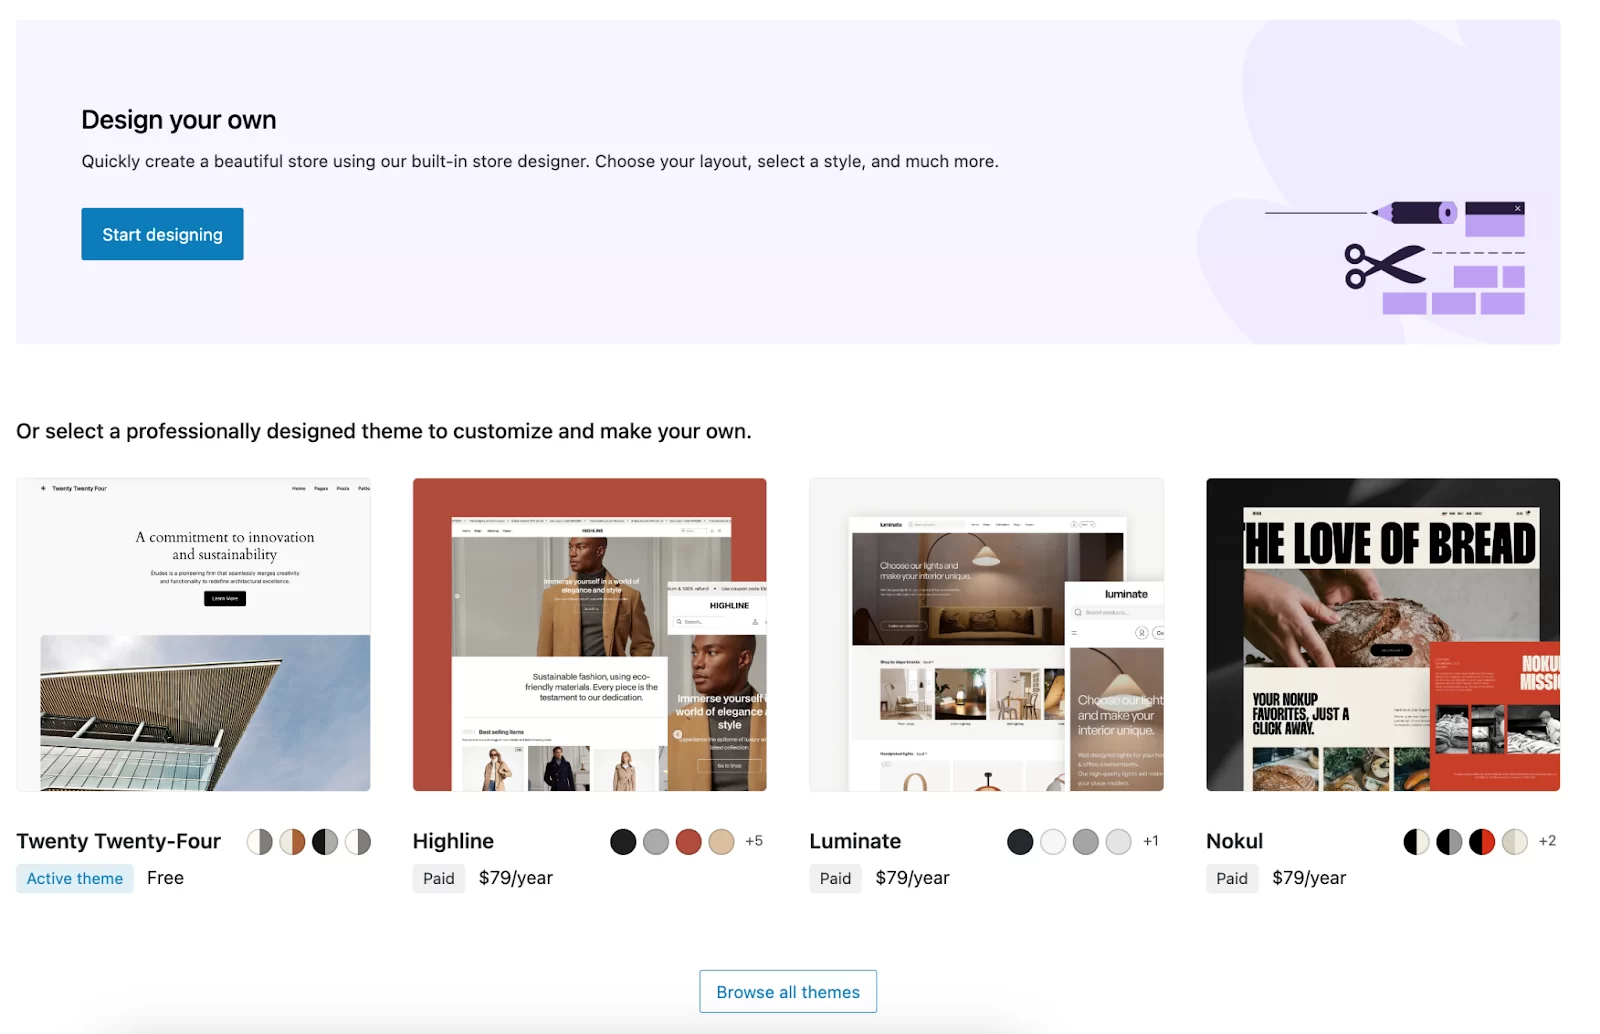
You can customize your site from here. Like adding logos, color palettes, fonts, layouts, etc. Here are the Woo store customization guidelines that may help you.
Step five: Add products
Next, you need to add products. From the WordPress backend, navigate to all products>add new. You can also import and export products if you have previously created a WooCommerce store.
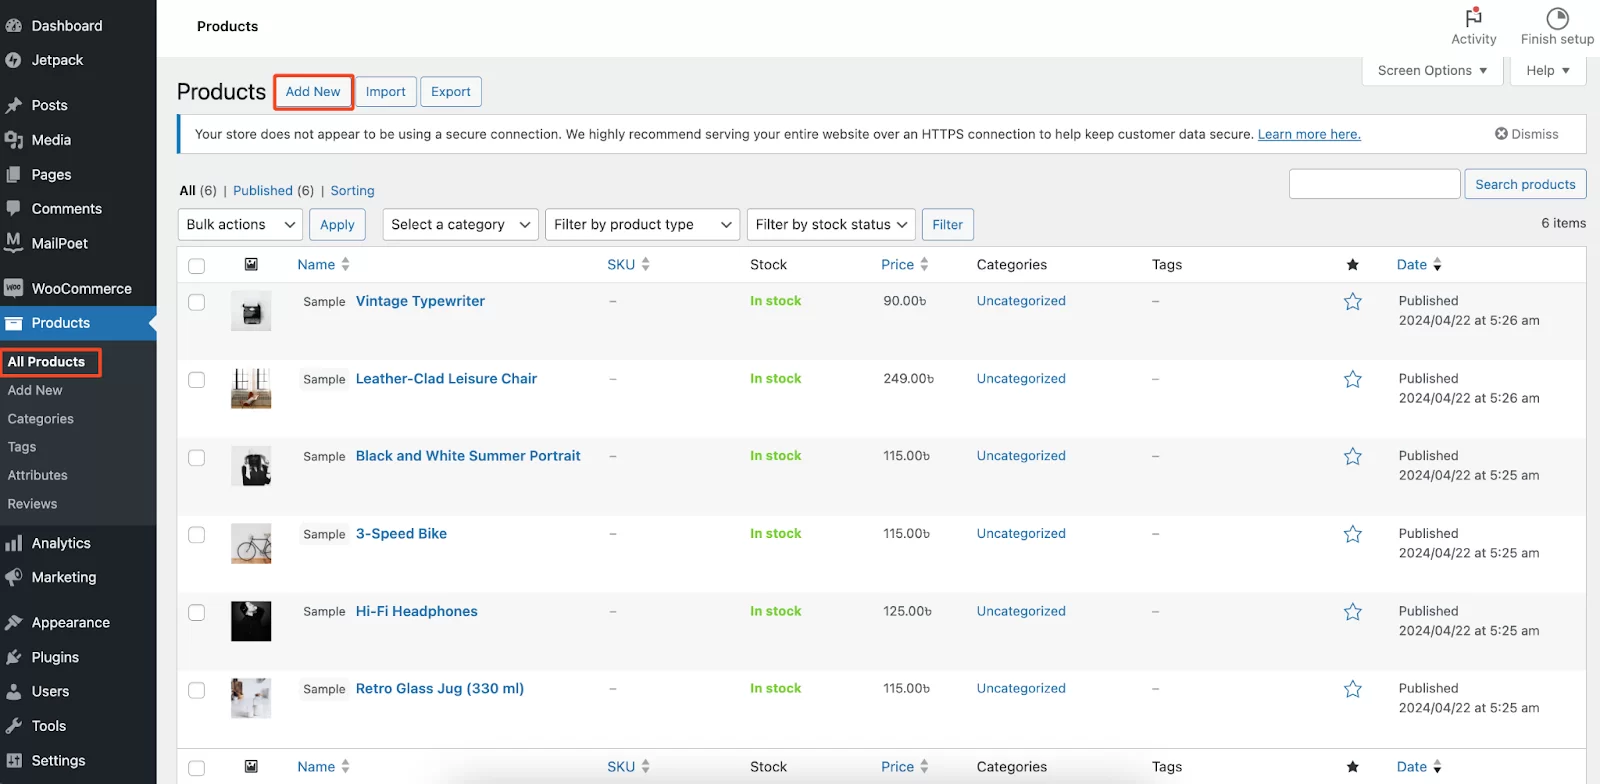
For detailed instructions, check out the documentation on how to add products to the WooCommerce store.
Product type: You need to understand it very well. WooCommerce treats everything you sell as a product, which is the main benefit of open source. However, it’s quite important to know the product type.
- Simple product: Physical products are considered simple products like food items.
- Variable: Physical products of different colors and sizes are considered variable products.
- Group: These are considered a set of single products, such as a set of plates or hand gloves.
- Virtual: Products like services are considered virtual. It doesn’t need any shipping cost or charge.
- Downloadable: Digital products such as eBooks or any PDF files are considered downloadable products.
- External or affiliate: You sell other people’s products on your site. The checkout process is maintained on third-party websites, which are considered affiliate products.
- Subscription-based: You can create and manage subscription-based products with WooCommerce. For that, you can provide them on a monthly or yearly basis.
- Membership-based: This option allows you to easily provide or restrict random users from accessing your service. However, only paid members will receive specific benefits or facilities.
- Bundles: Bundle products are mainly used to increase upsells. When users buy a product, they receive a set of product recommendations. For example, if you buy a laptop, you immediately, receive recommendations for a mouse, keyboard, headphones, and other accessories.
Pro tips: Smartly set categories, tags, and attributes
Proper organization of products is crucial for a successful online store. With categories, tags, and attributes, you can easily group your products and make it easier for customers to find what they want. Additionally, this can help increase the order value by showcasing related products.
With WooCommerce, creating and managing product categories and tags is easy. You can create and customize them anytime, whether you’re adding a new product or later. This flexibility ensures that your store is always up to date and easy for your customers to navigate.
Step six: Add payment method
Initially, you will have three available payment methods for your store. To do that, navigate to WooCommerce>Settings>Payments.
- Direct bank transfer
- Check payments
- Cash on delivery
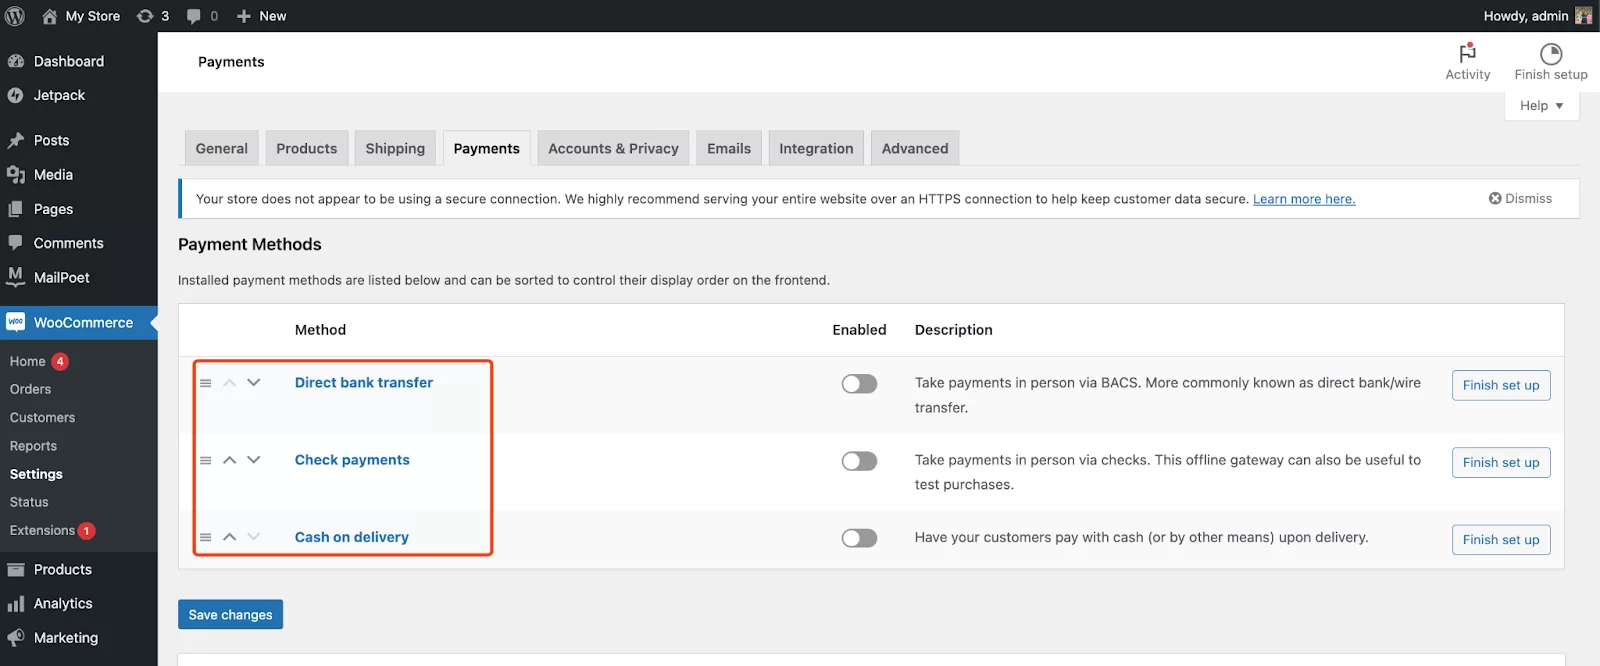
However, depending on your needs and requirements, you can use other popular payment gateways as your gateway system. Here are the available payment gateways for WooCommerce. Check them out one by one and set them up yourself.
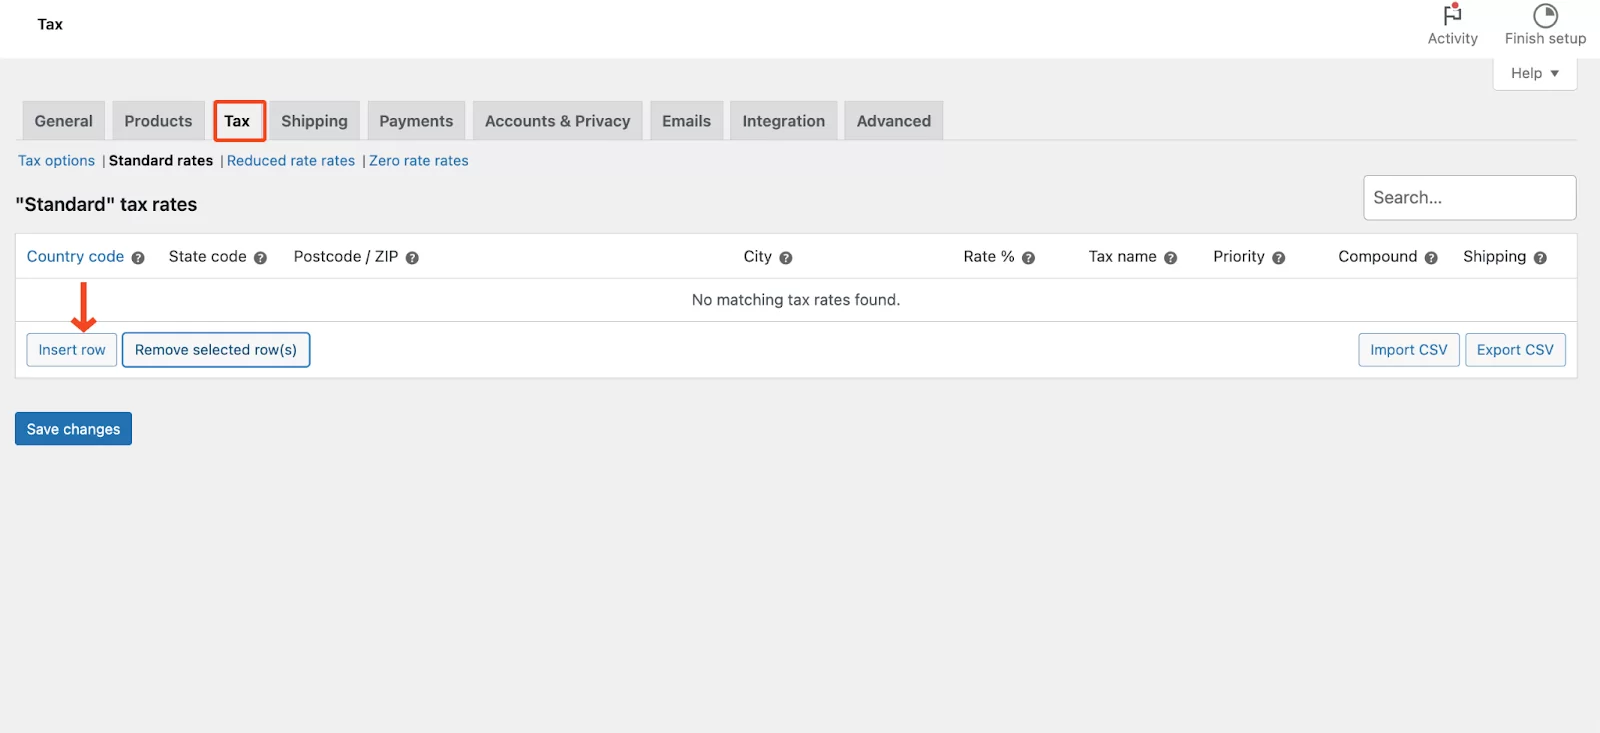
Step seven: Set up taxes
The next step is to set up taxes on your digital products. WooCommerce has a nice tax-related dashboard to help users set up taxes and other stuff.
Here’s the tax configuration dashboard. You can set the store location, address, postcode, city, and tax rates.
But remember, the tax rate may vary depending on the product type and category.
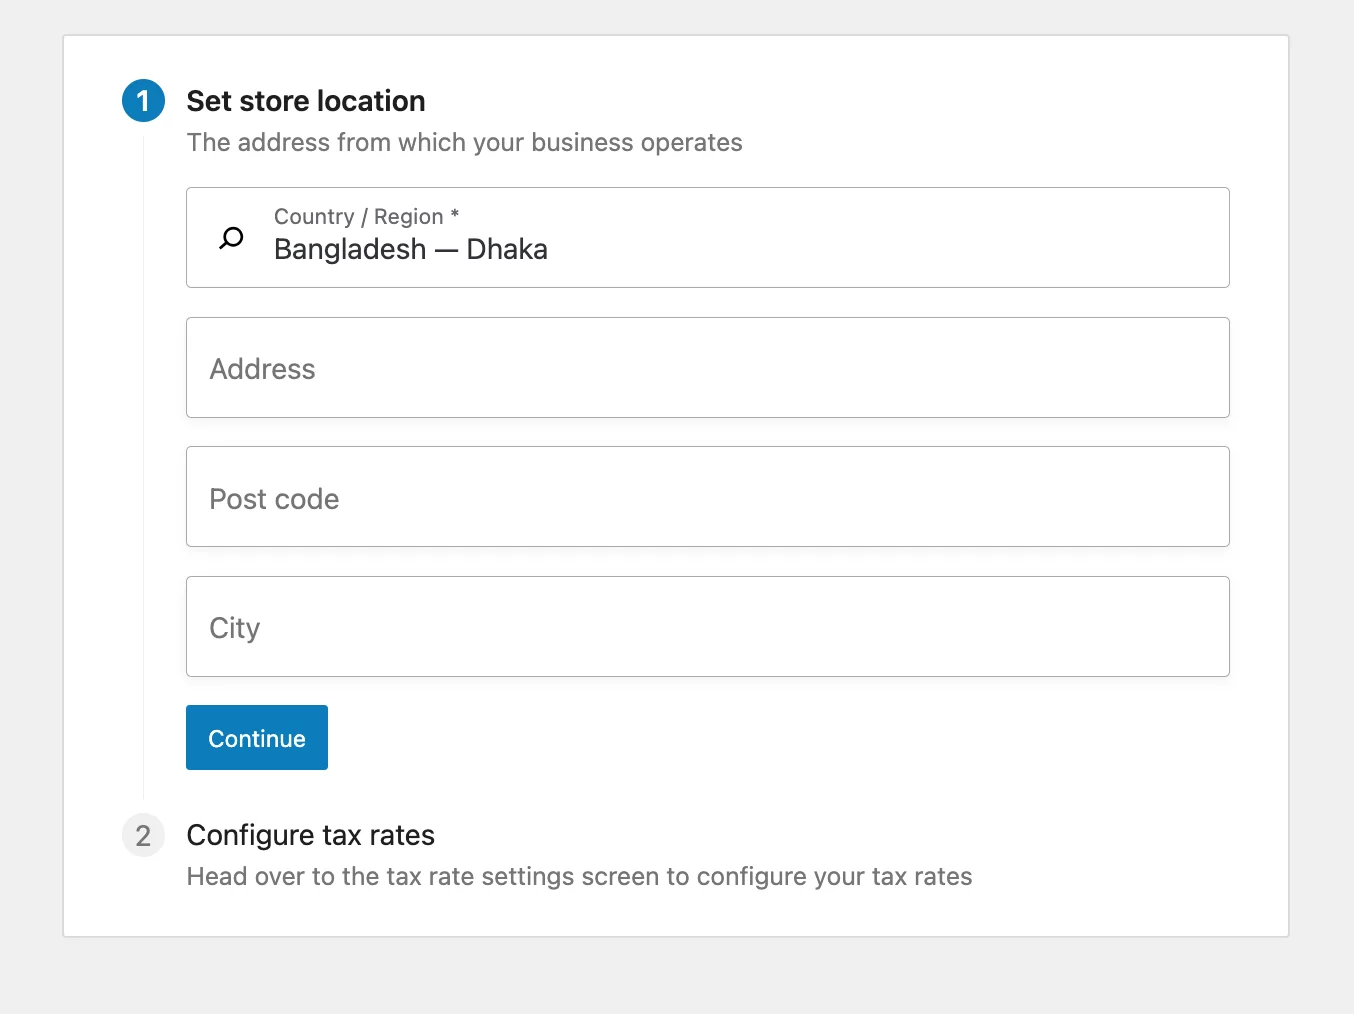
On the tax configuration page, you can manually set the tax rate for your product. Once you’re done, save everything.
More details:
Step eight: Add shipping method
If you’re running an online store that sells physical products, it’s crucial to ensure that your products are delivered safely to your customers. With WooCommerce, you can set variable shipping rates based on the destination of your products.
Moreover, if you’re based in the U.S., you can use WooCommerce Shipping to print shipping labels conveniently and take advantage of shipping discounts.
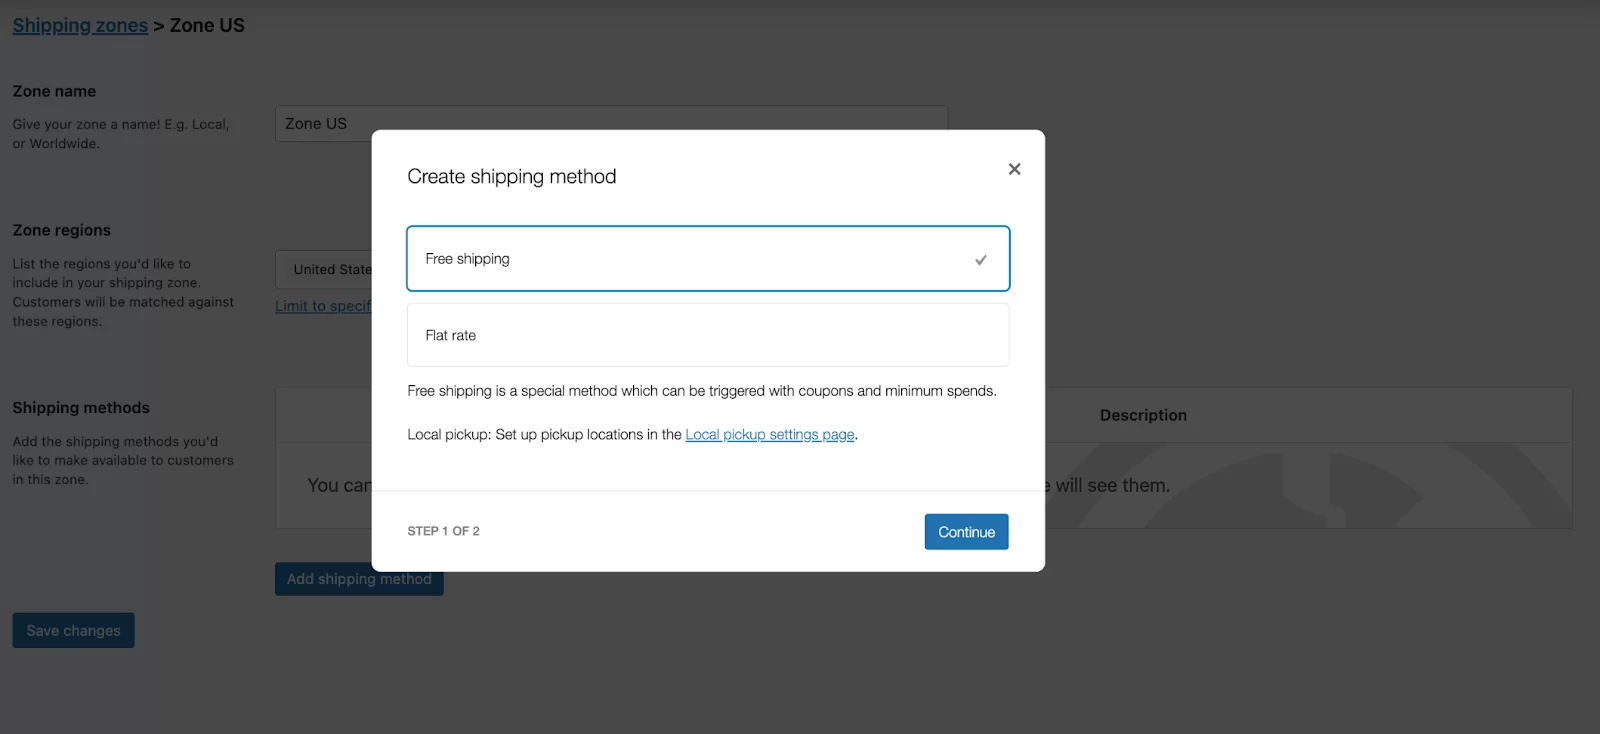
To do that, navigate to WooCommerce>Settings>Shipping>Then Add Zone.
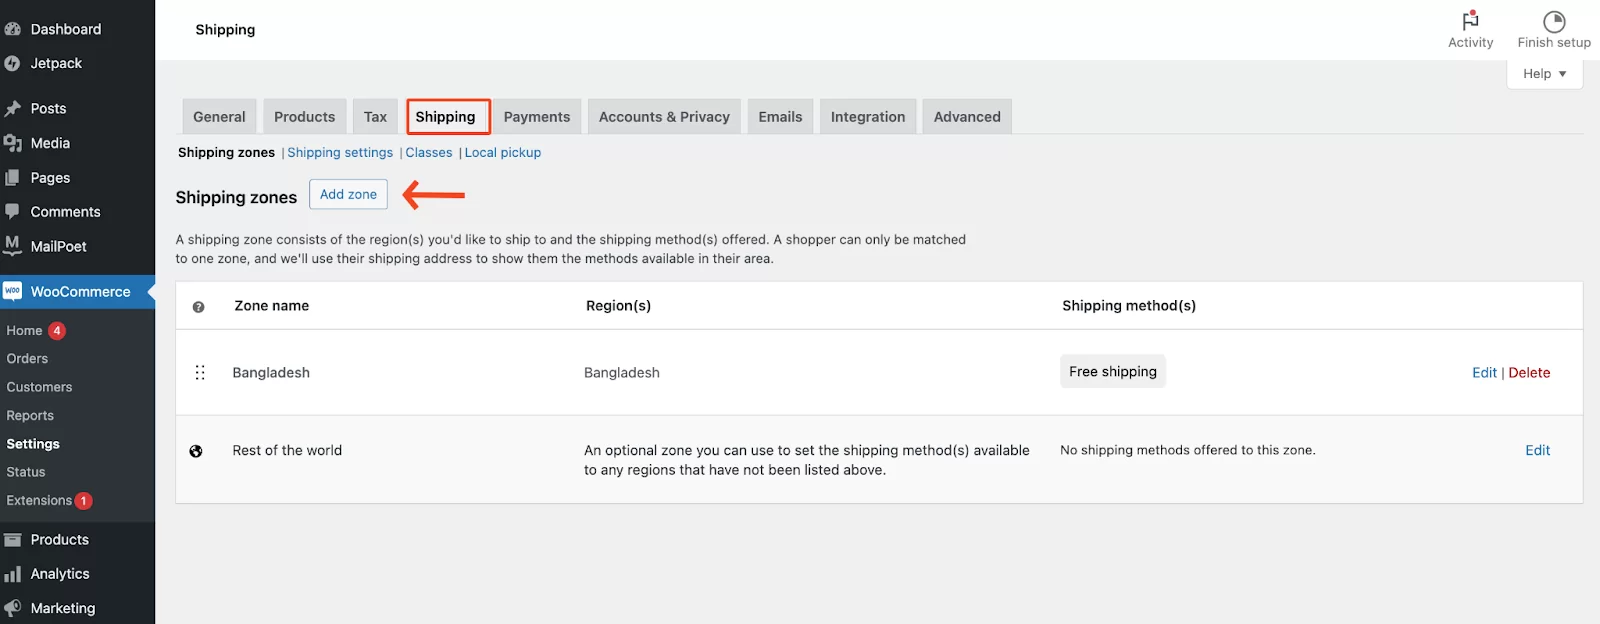
Once you get in, you can add the zone name, zone regions, and methods.
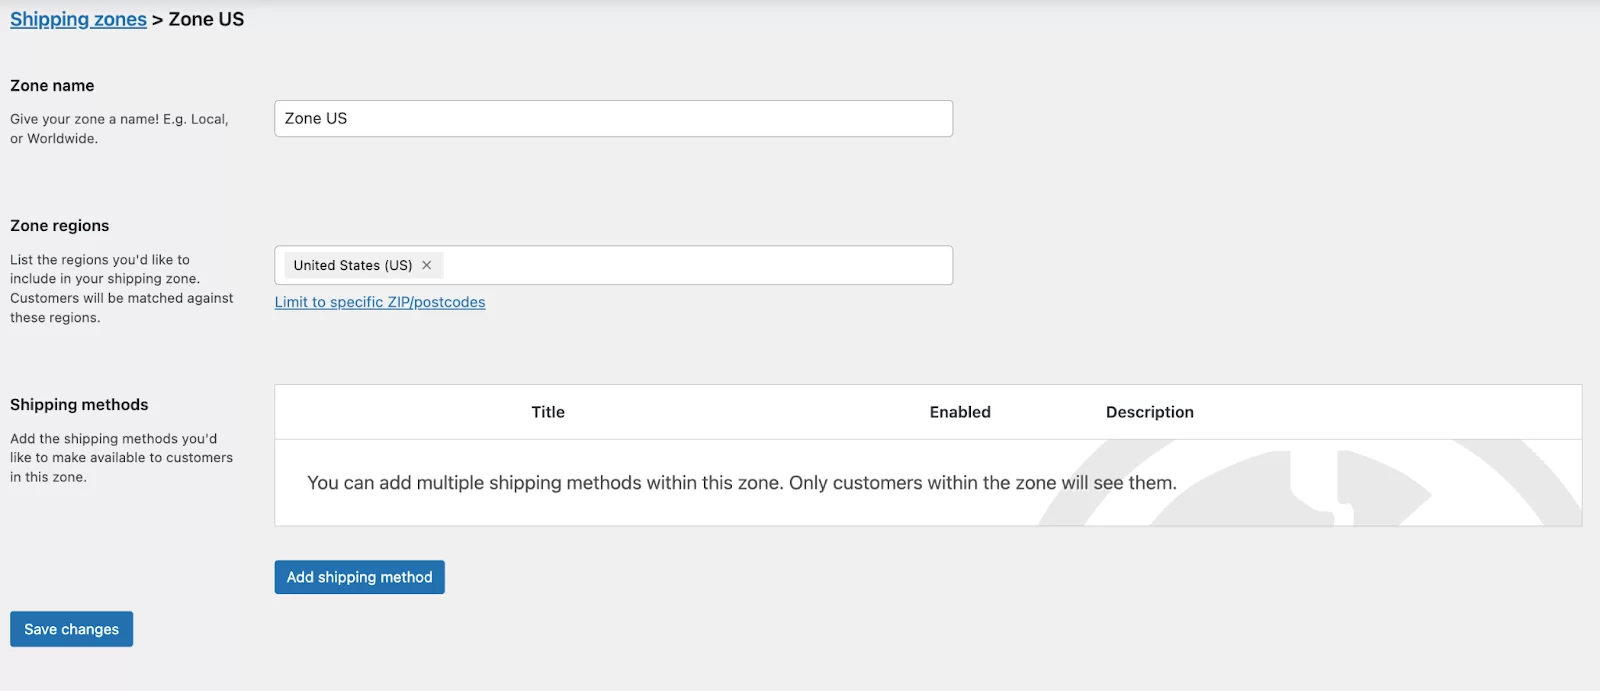
For now, you can add two types of methods free and flat rates once you are done, save all windows. And it will appear on the shipping page.
Additional resources to get started with the WooCommerce shipping:
Step nine: Security measures for your online store
So you have done all the initial essentials for your store, right? Now what? Yes, you guessed it right: the security measures.
According to SecurityMetrics, 63.86% of inspected ecommerce sites had suspicious issues. 33.73% of inspected ecommerce sites had concerning issues. It seems a threat to both users and site owners.
That’s why you need to take proper security measures to protect your online store from vulnerabilities and phishing attacks.
Let’s shed some light on it:
- Enable SSL Certificate
- Choose a secure hosting
- Regularly update software
- Use strong passwords
- Enable two-factor authentication (2FA)
- Use a secure payment gateway
- Have sales funnels to increase upsells
- Focus on data encryption
- Conduct security audit
- Concern about your customer education
- Keep a backup to encounter disaster
Additional step: Post-launch marketing plan
Launching a WooCommerce store is a great achievement. But the real struggle starts after creating it. You have invested, planned, and spent your crucial time and effort. All things will go in vain if you don’t take a proper marketing plan after the launch.
So we have compiled some initiatives for you to focus on for long-term success:
- Refine website performance and user experience with analytics and A/B testing.
- Attract organic traffic through SEO and valuable content creation.
- Engage your audience with social media marketing and targeted email campaigns.
- Cultivate customer loyalty with excellent service, loyalty programs, and personalization.
- Fuel growth by offering new products and exploring additional sales funnels.
- Ensure a mobile-friendly storefront for a seamless user experience on all devices.
- Maintain a strong security posture with regular updates, strong passwords, and backups.
- Monitor your checkout process and optimize it properly
- Use marketing tools to promote your store worldwide
- AutomateWoo
- MailPoet
- Google Analytics
- Google Listings & Ads
- TikTok
- Trustpilot
- Monitor website analytics to optimize your store for better results continually.
Final step: It’s a launch day🥳
Finally, the moment has come. Congratulations. You have completed all the steps, and the only remaining step is to publish your first online store with WooCommerce.
Conclusion
Your WooCommerce-powered online store has endless potential. This comprehensive book has given you the knowledge and resources to set up your store, attract consumers, and expand.
Remember, building an online business is a continual journey. Use data-driven optimization, provide excellent customer service, and love your products. With hard work and refinement, your WooCommerce business can exceed client expectations and achieve your entrepreneurial goals.
Start establishing your internet empire today by implementing your vision!

Nahid Komol
Nahid Komol is a product marketer and GTM strategist specializing in WordPress, SaaS, and AI-integrated growth (AEO, AIO, GEO). With 10+ years of hands-on experience at brands like FunnelKit, FlyWP, and weDevs, he brings deep expertise in content strategy, product positioning, user acquisition, and full-funnel marketing.He's led campaigns generating $100K in sales, grown organic traffic by 70%, and ranked 500+ articles on Google, and is now building AI agent workflows that automate core marketing operations at scale.When he's not crafting strategies or engineering prompt systems, you'll find him exploring sci-fi, composing music, or capturing the quiet poetry of nature through his lens.
Comments are closed